 |
| Hand woven Shetland roving rug, natural colors A few years ago, a friend loaned me a little child's loom. It would weave about 5 inches width-- but through those 5 inches, I fell down the rabbit hole! I need a bigger loom, I said. New ones were pricey but there was an antique one in pieces. You know which one I chose.  Now that it's home, how do I assemble it with no instructions?? Internet not helpful--- off to the library! Found an old weaving book with pictures:   Have been weaving ever since! Scarves, shawls, table runners, dish towels, a baby blanket and soft, squishy rugs. Meanwhile, the sheep just keep making wool.    some recent wool rugs:    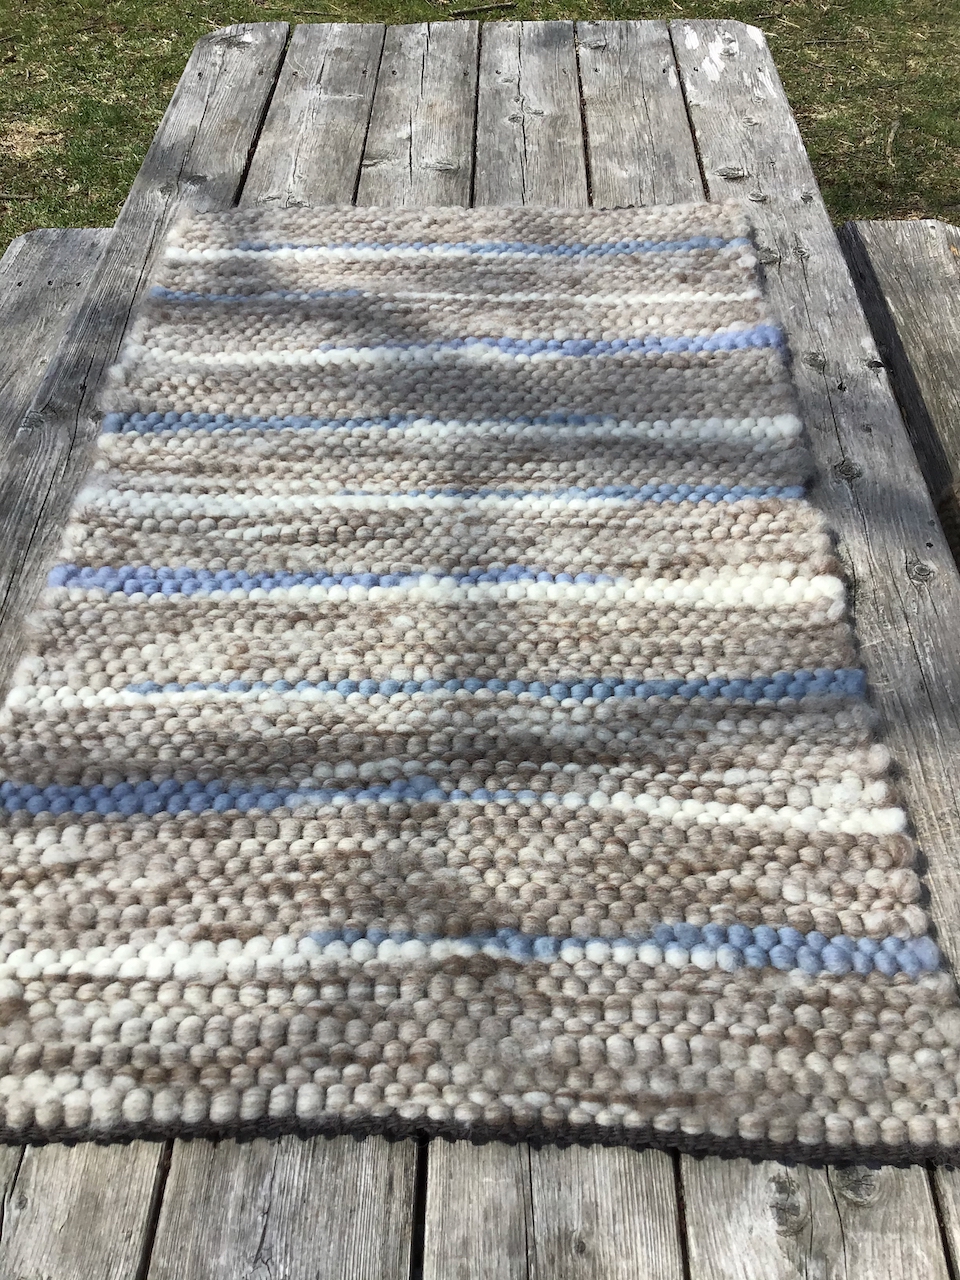  Rugs available in my Etsy shop! |
Weaving rugs 2021
A Tale of Woad II: more dyeing summer 2020
 |
| The Blue Froth!!! |
Had so many plants last summer,
I moved the dyeing outside
and
invited fiber friends to come share the bounty.
I was able to dye multiple batches of washed fleece and yarn.
The woad kept growing back!

 |
| torn up leaves, ready to go! |
 |
| poured boiling water over & let it steep |
 |
| A friend enjoys the magic moment when the yarn turns from green to blue |
 |
| turning from green to blue |
 |
| blue fleece drying |

 |
| shades of blue |
Plenty of blue roving to spin and for weaving into rugs.
 |
| wool rug with natural colors and woad blue accents |
A Tale of Woad : small scale dyeing tutorial
I planted woad in my garden a few years ago.
It's a scruffy plant, not much to look at.
Maybe it's my imagination,
but it seems that the leaves
already have a blueish tint.
but it seems that the leaves
already have a blueish tint.
And if you pinch a leaf, a little blue bruise appears.
 |
| needs a plant marker saying "I AM NOT A Weed" |
Woad, used in tapestries and textiles in centuries past,
is a rare source of indigo dye that can be grown this far north.
The dye process can be (ahem) unpleasant, involving
certain bodily fluids (or chemicals), and strange odors**
...but the color lasts for centuries!!
In the old tapestries,woad blue wool
was often overdyed
with yellow dye (from weld plants)
to make: Green.
As the years passed, the yellow has faded,
and some lovely ladies,
flowers,
and unicorns
have been left standing
in fields of Blue.
In the old tapestries,woad blue wool
was often overdyed
with yellow dye (from weld plants)
to make: Green.
As the years passed, the yellow has faded,
and some lovely ladies,
flowers,
and unicorns
have been left standing
in fields of Blue.
When I first started playing with natural dyes back in the 1990's,
I quickly tired of tans, golds and yellows.
I tried a recipe for 'copper penny blue'
but alas, it was not lightfast.
Decades later, my blue yarn
has faded completely
back to white:
 |
| crewel yarn dyed with dyers coreopsis, mullein and copper pennies |
Before aniline dyes were developed, if you wanted a lightfast blue,
you had to use imported indigo or extract the indigo from woad.
Woad contains the same dye chemical, just at a lesser concentration.
So a few years ago, I revisited natural dyeing,
and out of curiosity, I grew some woad here in Maine.
My first dyeing attempt yielded
a still-white silk scarf, unchanged
but for a barest whisper
of grey-blue. : (
The second year, I got a definite grey-blue;
took lots of notes and
saved seeds for another try.
 |
| Woad dyed silk scarf & mill-spun Shetland wool |
Last year, following the same procedure, the blue was bluer
but I have no idea why.
The joy of natural dyeing!
 |
| Woad dyed handspun Shetland singles & mill-spun 2 ply |
 |
| handspun Shetland crewel yarns: blue (woad), natural moorit brown, moorit/white blend; on linen |
Small Scale Dyeing with Woad:
You will need:
-first year woad plants (second year it goes to seed)
-Dyeing pots/utensils (not used for food ever again)
-RIT color remover (fresh) (craft store)
-Washing soda (the Woolery or Dharma trading)
-paper towels, paper plates, colander
-wool
1. Pick leaves. Tear them up and toss into a bowl.
( I used leaves from 5 small plants (~8 oz) on ~2 ounces of fiber, a 4:1 ratio plant:fiber when I got grey blue; I used only 3 plants and a 2:1 ratio when I got the bluer blue! Go figure. Or maybe not. )
Pour boiling water over the leaves (just enough to cover). Let steep as it cools for about 1 hour.


3. Cool completely to lukewarm (120 degrees F).
Stir in 1 1/2 T washing soda, enough to make the liquid turn greenish brown.
 |
| Greenish liquid on spatula. Using white utensils & containers really helps! |
4. Aerate the liquid by pouring back and forth between 2 containers. I used 2 quart-sized yogurt cups.
Make sure you are getting BLUE Froth. Add more washing soda if needed.
 |
| Aerating (adding oxygen into the liquid) |
 |
| we have Blue Froth!! |
Avoid making any bubbles from this point on!
6. Remove pot from heat, let stand 1 hour. Meanwhile, presoak your fiber in warm water.
7. Add fiber, gently. Let stand quietly for about 20 minutes. (no bubbles!!) The fiber will look green in the pot.
8. Time for the Magic to Happen: Remove fiber gently and lay it on a paper plate. Leave exposed to the air for at least 20 minutes. The green fiber will magically convert to BLUE as you pull it out of the pot Before Your Very Eyes!! Enjoy!
 |
| Green fiber in the pot, turning Blue on the plate! |
You can cover your dyepot
And keep it overnight
for more dyeing tomorrow....
BUT
you won't WANT to
cuz it smells like
**OLD CIGARS!!😝
Nov 24

We took a walk today at Biddeford Pool.
Not going near any woods today:
it's the last day of hunting season!
(we passed a few desperate-looking pickups parked next to the woods.)
So off to the coast! We walked the beach and
scrambled over the rocks at South Point.
I find rock-scrambling is a bit slower, more cautious
now that I'm over 50.
OK, over 60. (details, details...)
But the rewards are ever the same:
Cold blue sea, sky, rocks, wind, bright sun.
This may look like tangles of threads and yarn,
but it's actually veins in the rock


My old man and the sea. He grew up right here.
This foliage is not 'past peak'.....


He remembered the rock with the ring; called it a "haul-off".

'All the fishermen used them back in the day'
But who drilled that hole? How old is that iron?
Then we found some carvings in the stone...
 |
| "1968 Oleson" a trick of the shadows makes it look like raised relief |
 |
| "1918" initials |
 |
| this one has the Creator's initials |

One last look around, and
time to scramble (carefully) back again!

Aug 10 Wool Applique Tutorial 2
I designed this little wool applique door knob hanger last year.
I have made 3 of them so far, and the pattern is available in my Etsy shop.
 |
| Instant download from my Etsy shop |
This pattern has chain stitch embroidery for the vine, so you have to transfer the pattern onto black wool. Since you can't shine a light through the black fabric (well, you can try...), you can't just trace with a marker. Tissue paper to the rescue!! This is an old technique, and less messy than pouncing technique (don't even go there!).
Here's the way I did mine:
1. Trace design onto tissue paper. You only need to trace the parts that will be embroidered.
2. Trim off excess paper.
3. Pin the tissue paper to the fabric, making sure it's centered.
4. Knot your thread, and stitch over the drawn line with ordinary sewing thread.
Color should be a reasonable match to your embroidery thread.
 |
| Stitch right through both the paper and fabric. |
 |
| just do a basic running stitch, and tie it off as usual. |
5. Carefully tear off the paper, pulling to the side, not straight up.

6. Now you are ready to embroider. The chain stitch Perle cotton will easily cover up the green sewing thread.

I hope this is helpful to you. If you have other favorite ways to transfer designs onto dark fabric, feel free to comment. Maybe pouncing isn't as messy as it sounds!
Happy stitching!
-Sue
Aug 7 Wool Applique Tutorial 1
Preparing your project
This is how I cut out wool pieces for appliqué. For this demonstration, I was making small round ornaments or coasters.
5. With sharp scissors cut out the shape exactly on the drawn line. Remove paper.
1. Trace your (reversed) image onto the paper side of the fusible web.
2. Cut out the web roughly, leaving a margin. Press the web onto the correct color of wool using your iron (follow manufacturer's instructions).
2. Cut out the wool exactly on the drawn lines. Peel off the paper.
3. Time to stick the first piece of wool onto the background! Sometimes it's important to put the pieces on in the correct order!! For example, the green foliage must be put on before the gold pineapple fruit.
Peel off the paper, and place the wool shiny side down. Make sure the piece is exactly where you want it, then press with your iron to adhere. I gently spritz with a little water just before ironing so that it will make steam as well.
4. Add additional pieces, spritz and press again. If you make a mistake, don't worry, you can usually pull the piece off (you may need to reheat it a little) and reposition it.
5. Time to stitch your project! Be aware that really tiny pieces will not be adhered very strongly, so you should stitch them on first. That way they won't get lost.
6. Backing piece: In this example, I cut out extra black circles (using the freezer paper method). After the appliqué stitching was all finished, I pinned the backing on and blanket stitched around the edges. If you wanted your piece to be a little stiffer, you could cut out your backing with fusible web.
This is how I cut out wool pieces for appliqué. For this demonstration, I was making small round ornaments or coasters.
Background pieces: freezer paper method:
Freezer paper allows you to trace and cut an exact shape (here we are just doing a circle) and the paper also supports the wool nicely while you're cutting, so you get a cleaner cut.
1. Draw your background shape onto the smooth side of the freezer paper, using pencil.
 |
| I used a cashew can lid as a template...and had a snack too. |
2. Cut roughly around the shape, leaving a small margin that will be cut off later.
3. Lay paper on the wool, waxy side down.
4. Press to adhere the paper to the wool.
 |
| about 5-10 seconds with the iron should make it stick on |
 |
| and have a few more cashews.... |
 |
| I also cut out the backing pieces at the same time. |
Small design pieces: Fusible web method:
Fusible web allows you to trace and cleanly cut your wool pieces, and you can then position and bond them in place. I usually use Heat n Bond light, which is light enough to stitch through easily.
The alternative would be to cut out with freezer paper and then pin or glue everything in place. I find that fusible web gives better results, especially with small pieces. The fusible web protects the wool from fraying and makes the project very portable.
It is important to REVERSE your image (or make sure your templates have already reversed for you)
1. Trace your (reversed) image onto the paper side of the fusible web.
 |
| use a felt pen (Sharpie fine or similar) |
2. Cut out the web roughly, leaving a margin. Press the web onto the correct color of wool using your iron (follow manufacturer's instructions).
 |
| I'm making little pineapple ornaments using green and gold wool scraps. |
 |
| peel off the paper and flip the piece over so it's shiny side down, then press |
Peel off the paper, and place the wool shiny side down. Make sure the piece is exactly where you want it, then press with your iron to adhere. I gently spritz with a little water just before ironing so that it will make steam as well.
 |
| The pineapple foliage goes on first. Press to adhere. |
 |
| Add the gold piece, spritz again, press again. |
 |
| all ready for stitching! |
6. Backing piece: In this example, I cut out extra black circles (using the freezer paper method). After the appliqué stitching was all finished, I pinned the backing on and blanket stitched around the edges. If you wanted your piece to be a little stiffer, you could cut out your backing with fusible web.
Subscribe to:
Posts (Atom)