 |
| Hand woven Shetland roving rug, natural colors A few years ago, a friend loaned me a little child's loom. It would weave about 5 inches width-- but through those 5 inches, I fell down the rabbit hole! I need a bigger loom, I said. New ones were pricey but there was an antique one in pieces. You know which one I chose.  Now that it's home, how do I assemble it with no instructions?? Internet not helpful--- off to the library! Found an old weaving book with pictures:   Have been weaving ever since! Scarves, shawls, table runners, dish towels, a baby blanket and soft, squishy rugs. Meanwhile, the sheep just keep making wool.    some recent wool rugs:    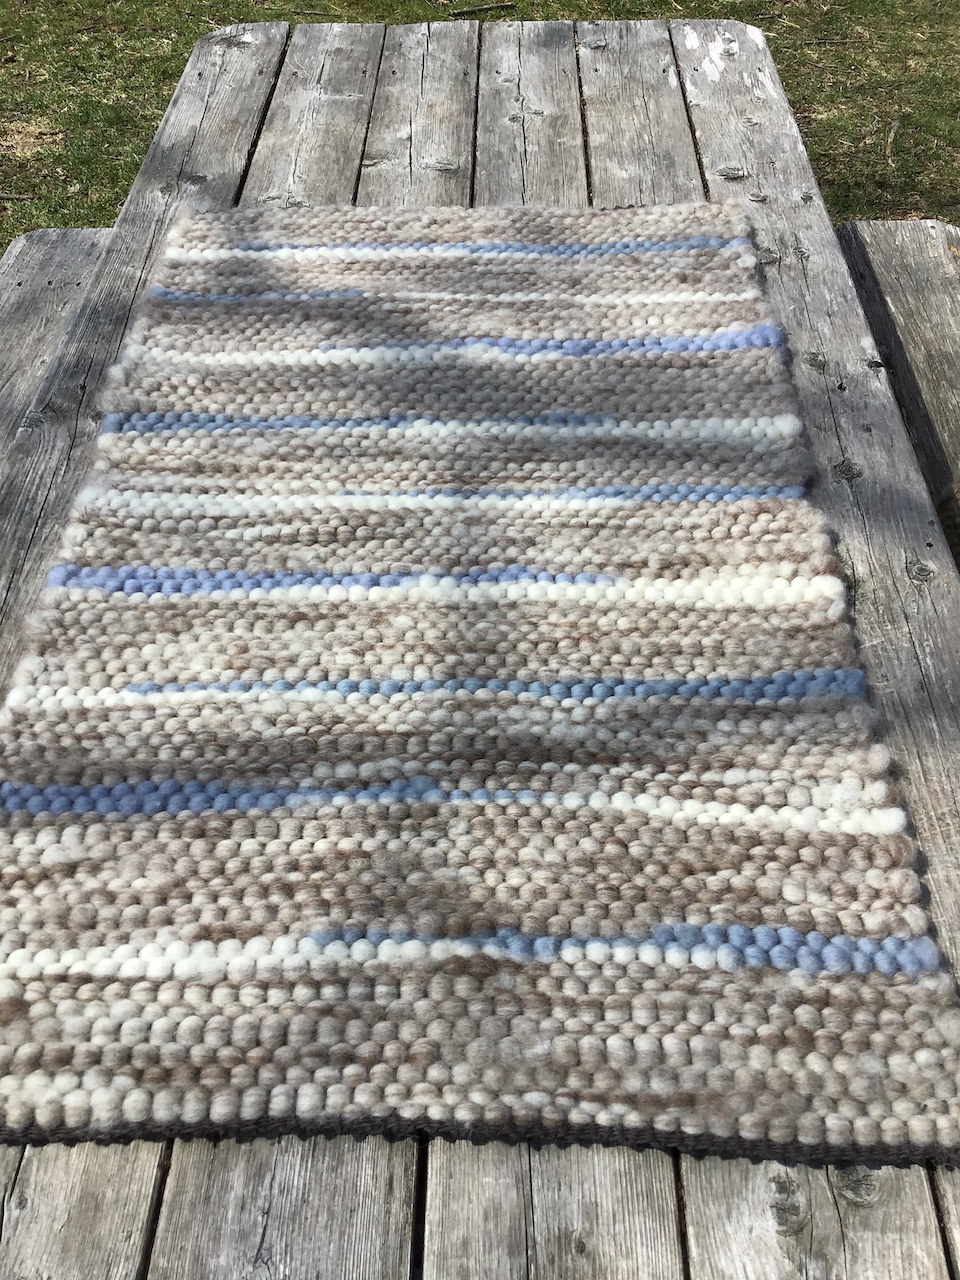  Rugs available in my Etsy shop! |
Showing posts with label Maine. Show all posts
Showing posts with label Maine. Show all posts
Weaving rugs 2021
Aug 10 Wool Applique Tutorial 2
I designed this little wool applique door knob hanger last year.
I have made 3 of them so far, and the pattern is available in my Etsy shop.
 |
| Instant download from my Etsy shop |
This pattern has chain stitch embroidery for the vine, so you have to transfer the pattern onto black wool. Since you can't shine a light through the black fabric (well, you can try...), you can't just trace with a marker. Tissue paper to the rescue!! This is an old technique, and less messy than pouncing technique (don't even go there!).
Here's the way I did mine:
1. Trace design onto tissue paper. You only need to trace the parts that will be embroidered.
2. Trim off excess paper.
3. Pin the tissue paper to the fabric, making sure it's centered.
4. Knot your thread, and stitch over the drawn line with ordinary sewing thread.
Color should be a reasonable match to your embroidery thread.
 |
| Stitch right through both the paper and fabric. |
 |
| just do a basic running stitch, and tie it off as usual. |
5. Carefully tear off the paper, pulling to the side, not straight up.

6. Now you are ready to embroider. The chain stitch Perle cotton will easily cover up the green sewing thread.

I hope this is helpful to you. If you have other favorite ways to transfer designs onto dark fabric, feel free to comment. Maybe pouncing isn't as messy as it sounds!
Happy stitching!
-Sue
Thistles paper cut and free template
More thistles...
I dug through my stash of Origami paper and found a luscious dark purple, so here's another Thistle paper cut.
I'm really craving grasses and wildflowers because of all the snow we have been having lately.
I'm really craving grasses and wildflowers because of all the snow we have been having lately.
 |
| © Susan Small 2014 |
This was quick and fun to cut out. Here's a free template you can use to cut your own thistles. If you arrange the thistles like my finished example, the image will be about 5x7". You can print out the template from here.
 |
| © Susan Small 2014 |
New Foxes Cut Paper Silhouette
 |
| © Sue Small 2014 |
more foxes….
I have been trying out some lighter weight papers instead of my usual card stock; it is so much easier to cut.
This fox and kits scene was done with my favorite #10 Exacto blade and Hygloss silhouette paper.
This fox and kits scene was done with my favorite #10 Exacto blade and Hygloss silhouette paper.
New paper cuttings
Summer 2013 -- This year we decided to enlarge the garden, so that's keeping me busy. I'm also working on a few more paper cuttings, and putting some items into my Etsy shop.
 |
| doe and fawn papercut |
 |
| Belted Galloway papercut |
 |
| Thistle papercut |
Christmas Story Shadow Puppets

Here's one of the shadow puppets from my Christmas Story shadow puppet set. This is a simple puppet show I made for a Sunday school class. I usually work with kids from 4th grade and up for shadow puppets. This is a good show for beginner puppetteers, since there are no moving parts on the puppets. Figure out ahead of time how the show will flow, which direction the puppets need to face. Assign puppet(s) to each child, and choose a narrator. After you run through it once or twice, let the kids trade puppets and try again. Or put on a show for another class to watch.
If you are doing this at home, invite grandma for Christmas Eve dinner and after you clear away the dinner dishes, set up the theatre, and the kids can put on the show.
Downloadable Puppet patterns are now available in my etsy shop.
The puppets can be used with my tabletop shadow theatre (see my earlier blog to make your own theatre)
The script I used can be found here: puppet script
Weekly illustration challenge
Recently I started participating in Illustration Friday.
A new topic is provided on Fridays, so participants have the weekend to figure out what to do. It's fun to go back and see what everyone came up with! There are some amazing ideas out there.
Here's my first 3 submissions:
 |
"Burst"
|
 |
"Identical"
|
 |
"Imagination"
|
Shadow Puppet Tutorial #1: How to Make a Shadow Puppet Theatre

This tutorial will show you how to make a tabletop Shadow Theatre and set up a shadow puppet show.
The tutorial for How To Make Shadow Puppets is here.

Materials for Theatre:
3 sided cardboard display board
Rotary cutter (or box cutter), cutting mat
Ruler
Masking tape, clear shipping tape
Freezer paper
Other materials:
shadow puppets (paper or cardstock); script
drinking straws
scotch tape
flourescent closet light

Procedure:
1. Lay the display board on the cutting mat; cut in half.
This will allow you to make 2 theatres.


2. Fold the display board inside out. The white side will face the audience.
Some boards cannot be folded inside out; in this case, cut the wings completely off and reattach with clear shipping tape.

3. Decide which end of your theatre will be the top. ( If there are any nicks on the edge from cutting, make that edge the bottom.)
4. Cut out a 12x19" rectangle from the center panel to be the screen.
Leave a 2" border around the top and sides of the center panel. The bottom border will be 3 3/4".

The slippery coated side should face the puppetteers.
You should allow about a 1-2" of freezer paper to overlap the edges.
Attach the freezer paper to the inside of the theatre (brown side) with masking tape.
I have used other papers and plastic for shadow puppet screens, but translucent freezer paper is my favorite material.

Your theatre is ready! You or your kids can decorate the audience side if desired.

I prefer to use angled lighting (see below) so that there are no sticks showing and no puppetteers showing.
For a clear image, press the puppets gently against the screen.

Note the puppet in this picture is laminated; I often laminate my puppets if I expect they will have a rough life. With certain lighting conditions the laminate edges may show very slightly. Adding a second light or an extra layer of freezer paper on the screen will reduce this effect.

Tape the short end of a flexible plastic drinking straw to your puppet.
Trim straw as needed.
This picture shows a large puppet with a moving arm, so I used 3 straws.

The puppetteer will hold the head & body straws in one hand, and move the puppet arm with their other hand.

Lighting:
The easiest lighting method I have found is a fluorescent closet light. The one pictured is electric but I have also used battery powered lights.
I have used other types of lighting as well. You should experiment to find what gives you the desired effect.
I hope you enjoy your shadow puppets!!
-Sue
Subscribe to:
Posts (Atom)